Monday Menu

After a summer with empty cupboards in the basement (our overflow pantry) and a mostly empty extra freezer, we have finally restocked some staples. Staples that we stockpile a little include cereal, pasta, frozen vegetables, canned goods (like beans and artichoke hearts), juice, flour, shredded cheese and condiments. Oh, and bacon. You know, things that have a high turnover.

I’ve saved a significant amount of money by coupon shopping in the past year, but it does take a little more preparation and concentration, difficult to achieve with three kids in tow during the summer months. But yesterday while Mr. Nine was at a birthday party, I had a couple hours to leisurely cruise Dominick’s and Walgreens with my coupon file. So when I made this week’s menu, I consulted the pantry and freezer first.

Monday: Pasta with artichoke hearts and oven-dried tomatoes

Tuesday: Mexican beef and tortilla casserole (Oh 1980s, we have not forgotten thee!)

Wednesday: Veal schnitzel, arugula and tomato salad, spaghetti squash

Thursday: Chicken noodle soup

Friday: Spinach and cheese lasagna (though for a weeknight, I’ll be making this with jarred sauce and no-boil noodles)


What staples do you stock up on?

Organizing the freezer

Cleaning out the freezer has been on my mental list of things to do for months. No, years. It must have been on my husband’s list, too, because one morning he just started pulling everything out and stacking it on the counter. (You never know when he’s going to snap like that.) We said goodbye to unidentifiable leftovers and tiny containers of mysterious sauces. The lack of labeling was a serious problem. We tossed everything that had excessive freezer burn. To be fair, our freezer is not that big, and we didn’t have some kind of stockpile going to waste. Mostly, it housed bits of things we felt bad about throwing away, so we stashed them in the freezer for another day. Too bad another day never came.

Once the freezer was empty, I vacuumed up the crumbs and scrubbed all the sticky spilled somethings out of the drawer. I don’t have a before picture–just use your imagination. I grouped like items together, consolidating the packaging if possible, and labeled everything. I designated the upper basket as the lunch supply area, and corralled the smaller ice packs in a bowl. The coffee is up there, too, because when you need coffee, you shouldn’t have to dig for it.

As I put everything back into the freezer, my husband wrote each item down on a list. A few days later I googled “freezer inventory sheet” and was rewarded with a huge selection of choices to print. Some were broken into categories, some were not. I decided to go category-free (I’m a rebel like that) because the categories didn’t seem to fit our items, which mostly fall under “Other.” Sure, I could have made my own inventory, but why? Excel is not one of my strong points, and there wasn’t a good reason to reinvent the freezer inventory. I bookmarked the one I printed so that I can print another when this one is used up.

I have a few rules for maintaining this freezer nirvana.

  1. Always label everything. Always. Everything.
  2. Freeze leftovers in single-serve containers, easy to pull out for lunches.
  3. Cook and freeze extra meals more often.

Maybe next week we’ll inventory the pantry. But I wouldn’t hold my breath if I were you. The pantry is a lot bigger than the freezer.

Monday Menu

We are way ahead of the game, here, and if I don’t watch it, I could get pretty smug. By Saturday afternoon, not only was the weekend’s menu all planned, but all of next week’s, too! AND the grocery shopping was done, AND the freezer was cleaned out. By Sunday afternoon, the Hub had already cooked the soup and pasta sauce for later in the week, and had dinner well on its way. The Hub took the lead on all these tasks, but I washed a lot of dishes and cleaned the gunk out of the bottom of the freezer drawer. I’d say we’re even. If I make some dessert, he’ll say we’re even.

Monday: Mote pillo (an Ecuadorean hominy dish), green salad

Tuesday: Garlic-Potato Soup, kale chips

Wednesday: Rustic Slow-Simmered Tomato Sauce with Meat, pasta, broccoli, Halloween candy for dessert

Thursday: Quiche (I’d like to try this crust recipe, but will streamline the rest), Carrot Salad with Creamy Lemon, Yogurt & Chive Dressing

Friday: Chili (I don’t exactly use a recipe, but this one is the same general formula), tortilla chips, fruit salad

Last week on Home Baked

Käsekuchen in America

Homemake Halloween costumes

Monday Menu

Do you have a special dinner planned for Halloween, or at least something you can heat up after trick-or-treating?

Käsekuchen in America

Last weekend I inhaled my new library book, My Berlin Kitchen, by Luisa Weiss. Those of you who spent a few years of your childhood in Germany, as I did, might recognize some familiar details. (Like a reference to the ubiquitous textured white wallpaper.) The book is a memoir with recipes, and the recipe that lodged itself in my brain was that for Käsekuchen, or German cheesecake. As a child, whenever offered a choice at a German bakery, I most often chose Käsekuchen. I spent the better part of Wednesday lamenting the high price of Quark cheese at the local specialty grocery ($4.99 for 8 ounces!), and then researching how to make homemade Quark and acceptable substitutions for Quark.

But back to yesterday. After reading a comment on another Käsekuchen recipe I dug up on the ‘net, I dashed over to our regular market that carries a wide selection of international foods. Sure enough, they had Swiss-style Twarog (apparently a Polish version of Quark) at only $3.99 a pound. Sold! I raced back home, mixed up the cake (I did contemplate the other recipe, because I’m fairly certain I used to eat Käsekuchen with a crust, but in the end, I went with Luisa’s simple crustless recipe–turns out, the farina in the pan magically creates a little crust), slid it into the oven, and then dashed off to the preschool carpool line. When we returned home, the warm, vanilla custardy aroma about knocked me over. People need to start baking cheesecake instead of burning scented candles.

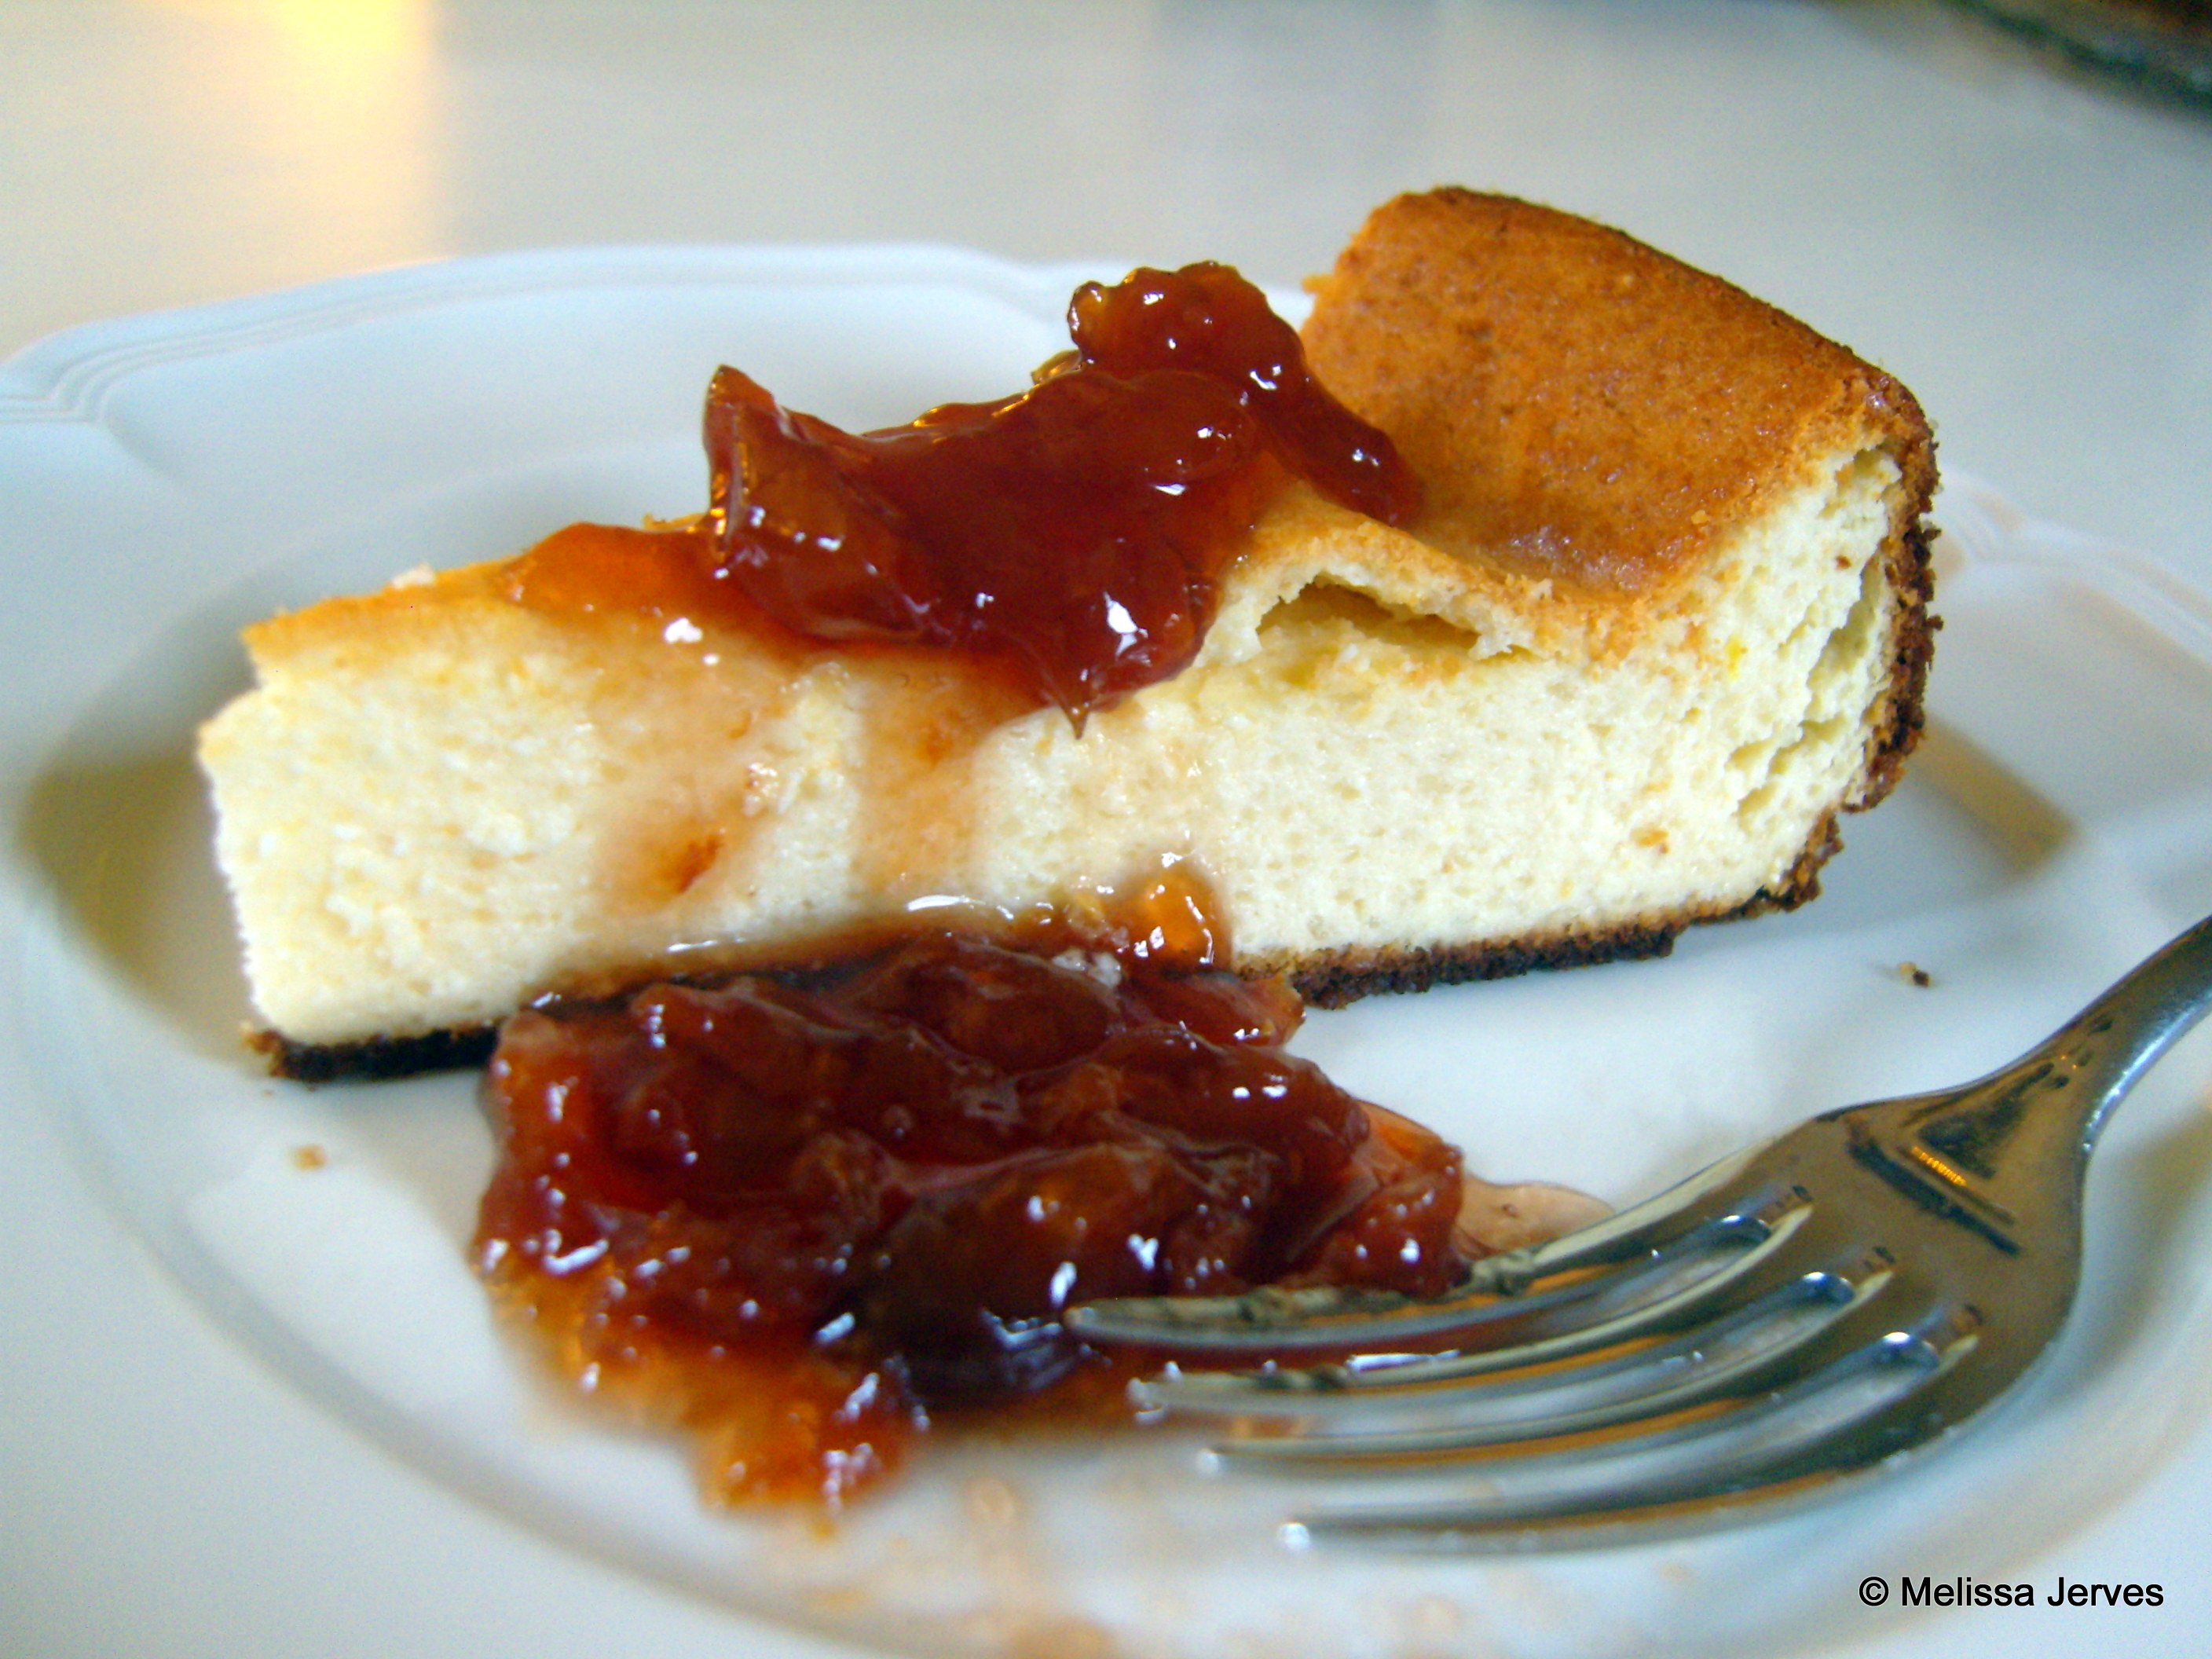
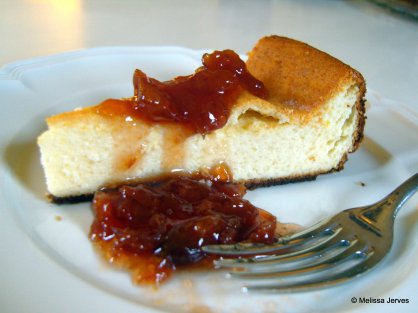
I think it must have been that aroma that spurred me to stay in the kitchen and mix up a batch of buttermilk bread dough (that, and realizing that there is but a single slice of bread left in the cupboard), and some chocolate granola (which I fully intend to hoard). Little Four kept himself busy in the basement all afternoon with playdough and some vintage Muppet Show (especially the Joel Grey episode). It was late in the day before I got to the dirty dishes, but by that time I was scraping every last cake crumb and drop of cherry preserves off my plate.

A few recipe notes, especially if you’ve read the book (go read it!). I had to adapt the instructions a bit from the original, perhaps because the cheese I used may not be as creamy as Quark. I first mixed the batter with the paddle attachment on my stand mixer, but the batter seemed lumpy with noticeable curds (see the first photo below), and the recipe said to beat until “smooth and creamy.” I switched to the whisk attachment, which didn’t help. Since I had seen recipes that used a mixture of cottage cheese with a little sour cream blended smooth in the food processor (after tasting the twarog, I think the cottage cheese/sour cream combo would be a fair substitute), I got out the immersion blender and it smoothed out the batter considerably (second photo). Maybe those curds would melt and smooth out on their own during baking, but I didn’t want to take the chance. So I recommend you use a food processor to mix the batter–it’s one step, and the batter will be smooth from the start.

Even with those hiccups, it didn’t take long to put the cake together. It did take significantly longer to bake than the recommended 45 minutes. The center didn’t puff and turn golden brown until 75 minutes in, but this left the bottom of my cake just this side of burnt. I used a dark nonstick springform pan, which unmolded perfectly, but probably contributed to the overly-browned bottom. If your pan is dark, go ahead and put the cake in the middle of the oven (not the lower third), and remove it as soon as it puffs up and gets a little color on the top.

But despite those tweaks, this Käsekuchen satisfied my longing. The kids liked it, too, and I didn’t feel guilty giving them a slice as an afternoon snack. I think it’s even better eaten cold the second day (I tested this theory just for you, dear readers). You don’t even need a plate.

Käsekuchen in America

2 lbs. Quark, or Swiss-style Twarog fresh cheese

2/3 cup sugar

1 T. vanilla extract

4 eggs

3 T. cornstarch

8 T. melted butter

2 T. farina (regular Cream of Wheat, not instant)

2 tsp. baking powder

Grated peel and juice of 1 lemon

Heat oven to 350 degrees. Grease a 9-inch springform pan (I used baking spray) and sprinkle a few extra tablespoons of farina to lightly but thoroughly coat the pan.

Put the cheese in the food processor and blend until smooth. Add the rest of the ingredients and process until you have smooth batter, scraping down the bowl several times. Spread the batter into the prepared pan, careful not to smear the farina coating.

Bake for 60-80 minutes, or until the cake has puffed in the center and turned a golden brown. Let cake cool completely in the pan on a rack before releasing the latch and unmolding. Serve at immediately or chill for later. Some people like a little fruit preserves or puree alongside.

Homemade Halloween costumes

I’m the first to admit that I don’t get that into Halloween. I don’t keep bins of Halloween decor in the basement and I still haven’t hung the single string of ghost lights that the kids love so much. Carving pumpkins is about as crazy as it gets. In fact, I get annoyed just thinking about the glut of candy that the kids will bring home next week. Candy that I will have to police and hide and manage its consumption. Lest you think I am some kind of Halloween Grinch, let me assure you that I let the older kids regulate their own sugar intake. They eat a few pieces a day and make it last until Thanksgiving. But Little Four has no such restraint and will inhale as much in a sitting as he can get his grubby hands on. The fallout is not pretty.

However, I do enjoy getting a little crafty with Halloween costumes. Nothing too elaborate, but if we can make a costume at home in a reasonable amount of time for less than it would cost to buy one, I’m in. It’s a great opportunity for me to use my haphazard sewing skills. No need to fuss with patterns or perfect fit. The kids don’t care if seams are puckered or the hem is crooked. I hunt around for some simple instructions and then wing the rest.

This year, Miss Seven is dressing up as a black cat. She suggested recycling the black witch’s robe that I made her last year into a tunic to wear over black leggings. Perfect–didn’t even have to buy any new material. I cut it shorter and fashioned a belt with a cat’s tail attached. I also attached some felt ears to a headband. On Halloween we’ll draw some whiskers on her face (and make sure she’s wearing a warm black sweater under her costume when she goes trick-or-treating).

After some conversations with his grandpa, Little Four settled on Frankenstein as his costume. I found a tutorial for this wonderful Frankenstein hat, which was not difficult at all. Cheap, too–what little fabric I had to buy cost me less than $3. You could even hand stitch it if you don’t have a sewing machine. I found some spare hex nuts floating around the house, so I stitched those on instead of trying to make bolts out of fleece. As soon as I finished it, Little Four put on his Frankenstein hat and wore it through an entire piano lesson and several hours of play. We’ll add some green face paint and some ragged clothes for Halloween. He’s already mastered the monster walk.

Have you gotten crafty for Halloween?

Monday Menu

The leaves are green and gold outside the window, and I am stretched out on the living room couch with the cat, still full from Sunday dinner, and grateful that I have cooked so much this weekend that I can take it easy in the kitchen for the next couple of evenings. There’s even a tin full of gingersnaps in the cupboard and a container of addictive mixed nuts (though let’s be real–these won’t last). Maybe I’ll take a few moments to restock the empty granola canister or mix up some bread dough. Even though these recipes don’t really take more than five or ten minutes, I often stumble over a mental block of the Must-Make-Dinner-No-Time-for-Anything-Extra variety.

The light is fading and it’s time to call the kids inside and give them a snack before bedtime. I need everyone tucked in by 8 p.m. so I can watch Upstairs, Downstairs.

Monday: Steak sandwiches, Crash Hot Potatoes, Salad

Tuesday: Fried rice with edamame and leftover beef short ribs

Wednesday: Pasta with Kale and Ricotta

Thursday: Roast Chicken, Pan-Roasted Asparagus with Anchovy Bread Crumbs

Friday: Cheeseburgers

Saturday: Chicken salad, Beet & Cabbage Borscht with Dill


What do you like to cook when you have extra time in the kitchen?

Top 5 slow cooker recipes

Does anyone else hear John Cusack in High Fidelity whispering in your ear about mix tapes? Okay, it’s just me. That’s okay–my dinner is already in the Crock Pot, which might give me time to go make a mix tape of my own (or maybe just go watch the movie).

Anyway, if you’re not using your slow cooker, I’m here to tell you that you should. I know, every recipe you see is full of cream-of-something soup and comes out looking like glop. I’ve tried my fair share of those, and to be honest, I’m still experimenting. But today I’m going to share my top five, never-fail slow cooker recipes. No, they’re not all one-pot dinners. A lot of times I find myself using the slow cooker to make components of meals so I don’t have to rely so much on canned goods that may have more sodium and additives than I’d like.

5. Overnight steel-cut oatmeal. 1 cup steel-cut oats, 4 cups water (or milk), a pinch of salt, any fruit or spices you like. Spray the slow cooker really well with cooking spray OR mix the ingredients in a heat safe bowl that fits inside the crock and pour enough water around it to come up about half the height of the bowl. Cook on low for 7 hours (if you use the bowl/water bath method, the timing is not so critical). In the morning, serve and add some toppings (I like brown sugar, chopped nuts and a drizzle of milk).

4. Chickpeas (or other beans). No soaking necessary, and great overnight. Rinse a 1-lb. bag of dried beans, dump in the crock with 8-10 cups of water. Cook on low 8-10 hours, or until beans are tender. Use some to make hummus or falafel and freeze the rest.

3. Pulled pork. No, it hasn’t been smoked for hours on a grill, but it’s awfully good. I like this recipe from Our Best Bites, but I like to add some cumin and use a splash of apple cider vinegar as the liquid. I cut the BBQ sauce with vinegar, too. Don’t forget the pickles and the slaw. This is great on a weeknight, and just as good for a party.

2. Overnight chicken broth. Chicken carcass and water. You can add some onion and vegetables if you like. Cook on low overnight. Strain and freeze. Free chicken broth, and you don’t even need a coupon.

1. Fauxtisserie Chicken. Every time there’s a good sale on whole chickens, I buy a couple and stick them in the freezer. This recipe is like Roast Chicken for Dummies, or at least for people who get home late from work/karate/piano lessons and need to eat RIGHT NOW. It’s also a great way to cook chicken that you want to use in another recipe. The meat falls right off the bone and is incredibly moist and juicy.

There you have it–my Top Five ways to use the slow cooker. Go forth and make your slow cooker work for you!

What’s  your Number One slow cooker recipe?

Painting oak trim and doors

I know some people think it’s sacrilege to paint over wood trim, but I feel fully justified in this case. Here’s the deal: Most of the doors and trim in our house were painted white by previous owners. Our kitchen cabinets and crown molding are white. But in a few spots–most notably the foyer, hallway and family room–there was newer yellow oak trim and hollow-core slab doors.

This isn’t lovely original millwork that ought to be preserved. I assume these were added when the hardwood floor was replaced at some point, because they don’t match the original baseboards and trim upstairs. Unfortunately, these spaces flow right in to the living room and kitchen, where the trim is white. So we’ve lived with all this strange conflicting trim–some of it even on the same wall!–for five years. It hurt my eyes.

Oak trim around the white sidelights and black front door. Too many finishes!

A few weeks ago, I finally got out the paintbrush and began on the trim in the foyer. Today I’m priming (maybe I’ll get to a coat of paint) the trim and three doors (pantry, bathroom and basement) in the hallway. For the foreseeable future, we’re leaving the family room alone. The room is more self-contained, so the conflicting finishes don’t stand out so much.

Finished front door and baseboards.

This is still a work in progress. I’m reasonably confident I’ll finish the painting this week, but I still need to remove the closet doors so I can paint the inside of the door frame. I would also like to add trim to the slab doors, like this project I found on Pinterest.

Like most of you, I don’t have great swaths of time to work on these projects. Just 30 minutes here and there, between writing projects, laundry, supervising homework, chauffeur duty, and today, a sick child home from school. Too often I put things off because I don’t think I’ll have enough time to complete them. But usually, if I just start something, it doesn’t take very many of those small pockets of time to complete it. And the results are worth it.

One door primed, one to go.

If you’re tackling a project like this yourself, you might want to know what products I’m using. Even though the oak has a glossy coat of polyurethane on it, I’m not doing any sanding. I wiped everything down with a liquid deglosser, then used one coat of primer. Two coats of good quality interior semi-gloss (we’re using Benjamin Moore’s base white color), and it’s done. I’ve painted some trim without using the deglosser first, and it required at least two extra coats of paint, so I’d definitely recommend it.

Already, the streaky coat of primer on those doors has brightened up the dark hall. I’m off to prime one more, and tomorrow I’ll do a little more.

Primer done! Tomorrow: paint.

Monday Menu

It’s been a while since I mixed up some no-knead bread dough (instead I’ve been experimenting with other pizza dough recipes), but the Hub asked for homemade pita this weekend, so I spent five minutes and mixed it up. Now we’ll also have fresh bread this evening and pizza dough on Friday. I really need to write “Mix up bread dough” on my calendar once a week. Maybe I just need a spot on the calendar for batch cooking for the rest of the week. I’m always thrilled with the results when I remember to stock the cupboards with muffins or granola, grill lots of chicken or roast several pans of vegetables. It just makes the rest of the week’s meals so much easier.

Lucky for me, the Hub made tonight’s soup over the weekend, so my only job tonight is to bake the bread and make a salad. I think I can manage that between Little Four’s tap class and my choir practice!

Monday: Beef Barley Soup, salad, bread

Tuesday: Thai-style Ground Pork, Coconut Rice

Wednesday: Fish tacos

Thursday: Slow cooker Indian-Spiced Lentils and Chicken

Friday: Pizza

Last week on Home Baked

Big girl’s bedroom inspiration

Monday Menu


Do you have a routine for cooking large batches of food for the coming week? Please share!

Big girl’s bedroom inspiration

I’m thrilled to report that Miss Seven’s obsession with all things pink has run its course. She doesn’t hate pink, but these days she’s more likely to choose blue or purple as her favorite color, and–get this!–her favorite sweater is charcoal gray. So a bedroom makeover is on the horizon. If you know Miss Seven, you know that although she’s incredibly quiet, she is not without opinions. Very Firm Opinions. I knew I couldn’t get away with redesigning her room myself and springing it on her. Instead, I’ve been using Pinterest to collect ideas to run by her. If she doesn’t like it, I remove it from the board, and slowly we’re narrowing down a vision of her new room.

Here’s the before picture!

The palette we’ve chosen has pale aqua walls, with pops of bright pink and yellow and plenty of white in the furniture and linens. Other changes include:

  • a bigger dresser (she’s inherited my old one, and we’re going to strip it and stain it a dark pink)
  • a reading nook (yellow wicker chair with bright cushions and maybe her canopy around it)
  • a sturdier nightstand with storage
  • a different headboard (probably white)
  • a larger area rug (I found a large rag rug in multicolored pastels on Craigslist)
  • a bigger book case and a large pin board for her art
  • declutter and rearrange

As usual, our budget = As Cheap as Possible. I like sturdy furniture for kid’s rooms, but I don’t like investing a lot in pieces that are sure to take abuse. As an example, Miss Seven has a desk that came from my grandparents’ house that I painted white. As these things happen, some nail polish remover soaked onto the desk top recently and peeled away some of the paint. If I had paid good money for a new desk, I would have been upset. But since I only invested some time and spray paint in it, I’m not concerned. One of these days I’ll touch it up and all will be well. Until the next accident!