The week in review

How is it Friday already? This week flew by in a whirlwind of gardening, doctor’s appointments, buying school supplies, and watching the Olympics. And playdates. Lots of playdates. So here it is Friday (I swear I thought it was Thursday when I woke up this morning), and the blog posts in my head are as yet unwritten, unpublished.

So here’s a quick summer-is-winding-down summary of my week for you:

Garden:

As a result of the drought this summer (and our neglect while away on vacation), we are now performing triage on our ragged lawn and garden. Our efforts to water the front lawn seem to be making a difference (let’s just agree not to talk about the weeds or the layer of pine needles). I have been hacking away at the wilted brown daylilies and miles of weeds that have overtaken the flower beds. My doctor told me I need to do more cardio, but I think my daily hour (or three) swinging a hoe is going to count this week. I planted some mums, spread some mulch, and have created many piles of yard waste to bag for pickup next week. And in a feat of superhuman strength, my husband single-handedly chopped down two-thirds of our overgrown hedge. Next week: more weeding, more mulch.


Do you have any great hints for maintaining your lawn and garden in the worst of the summer heat?

Cooking:

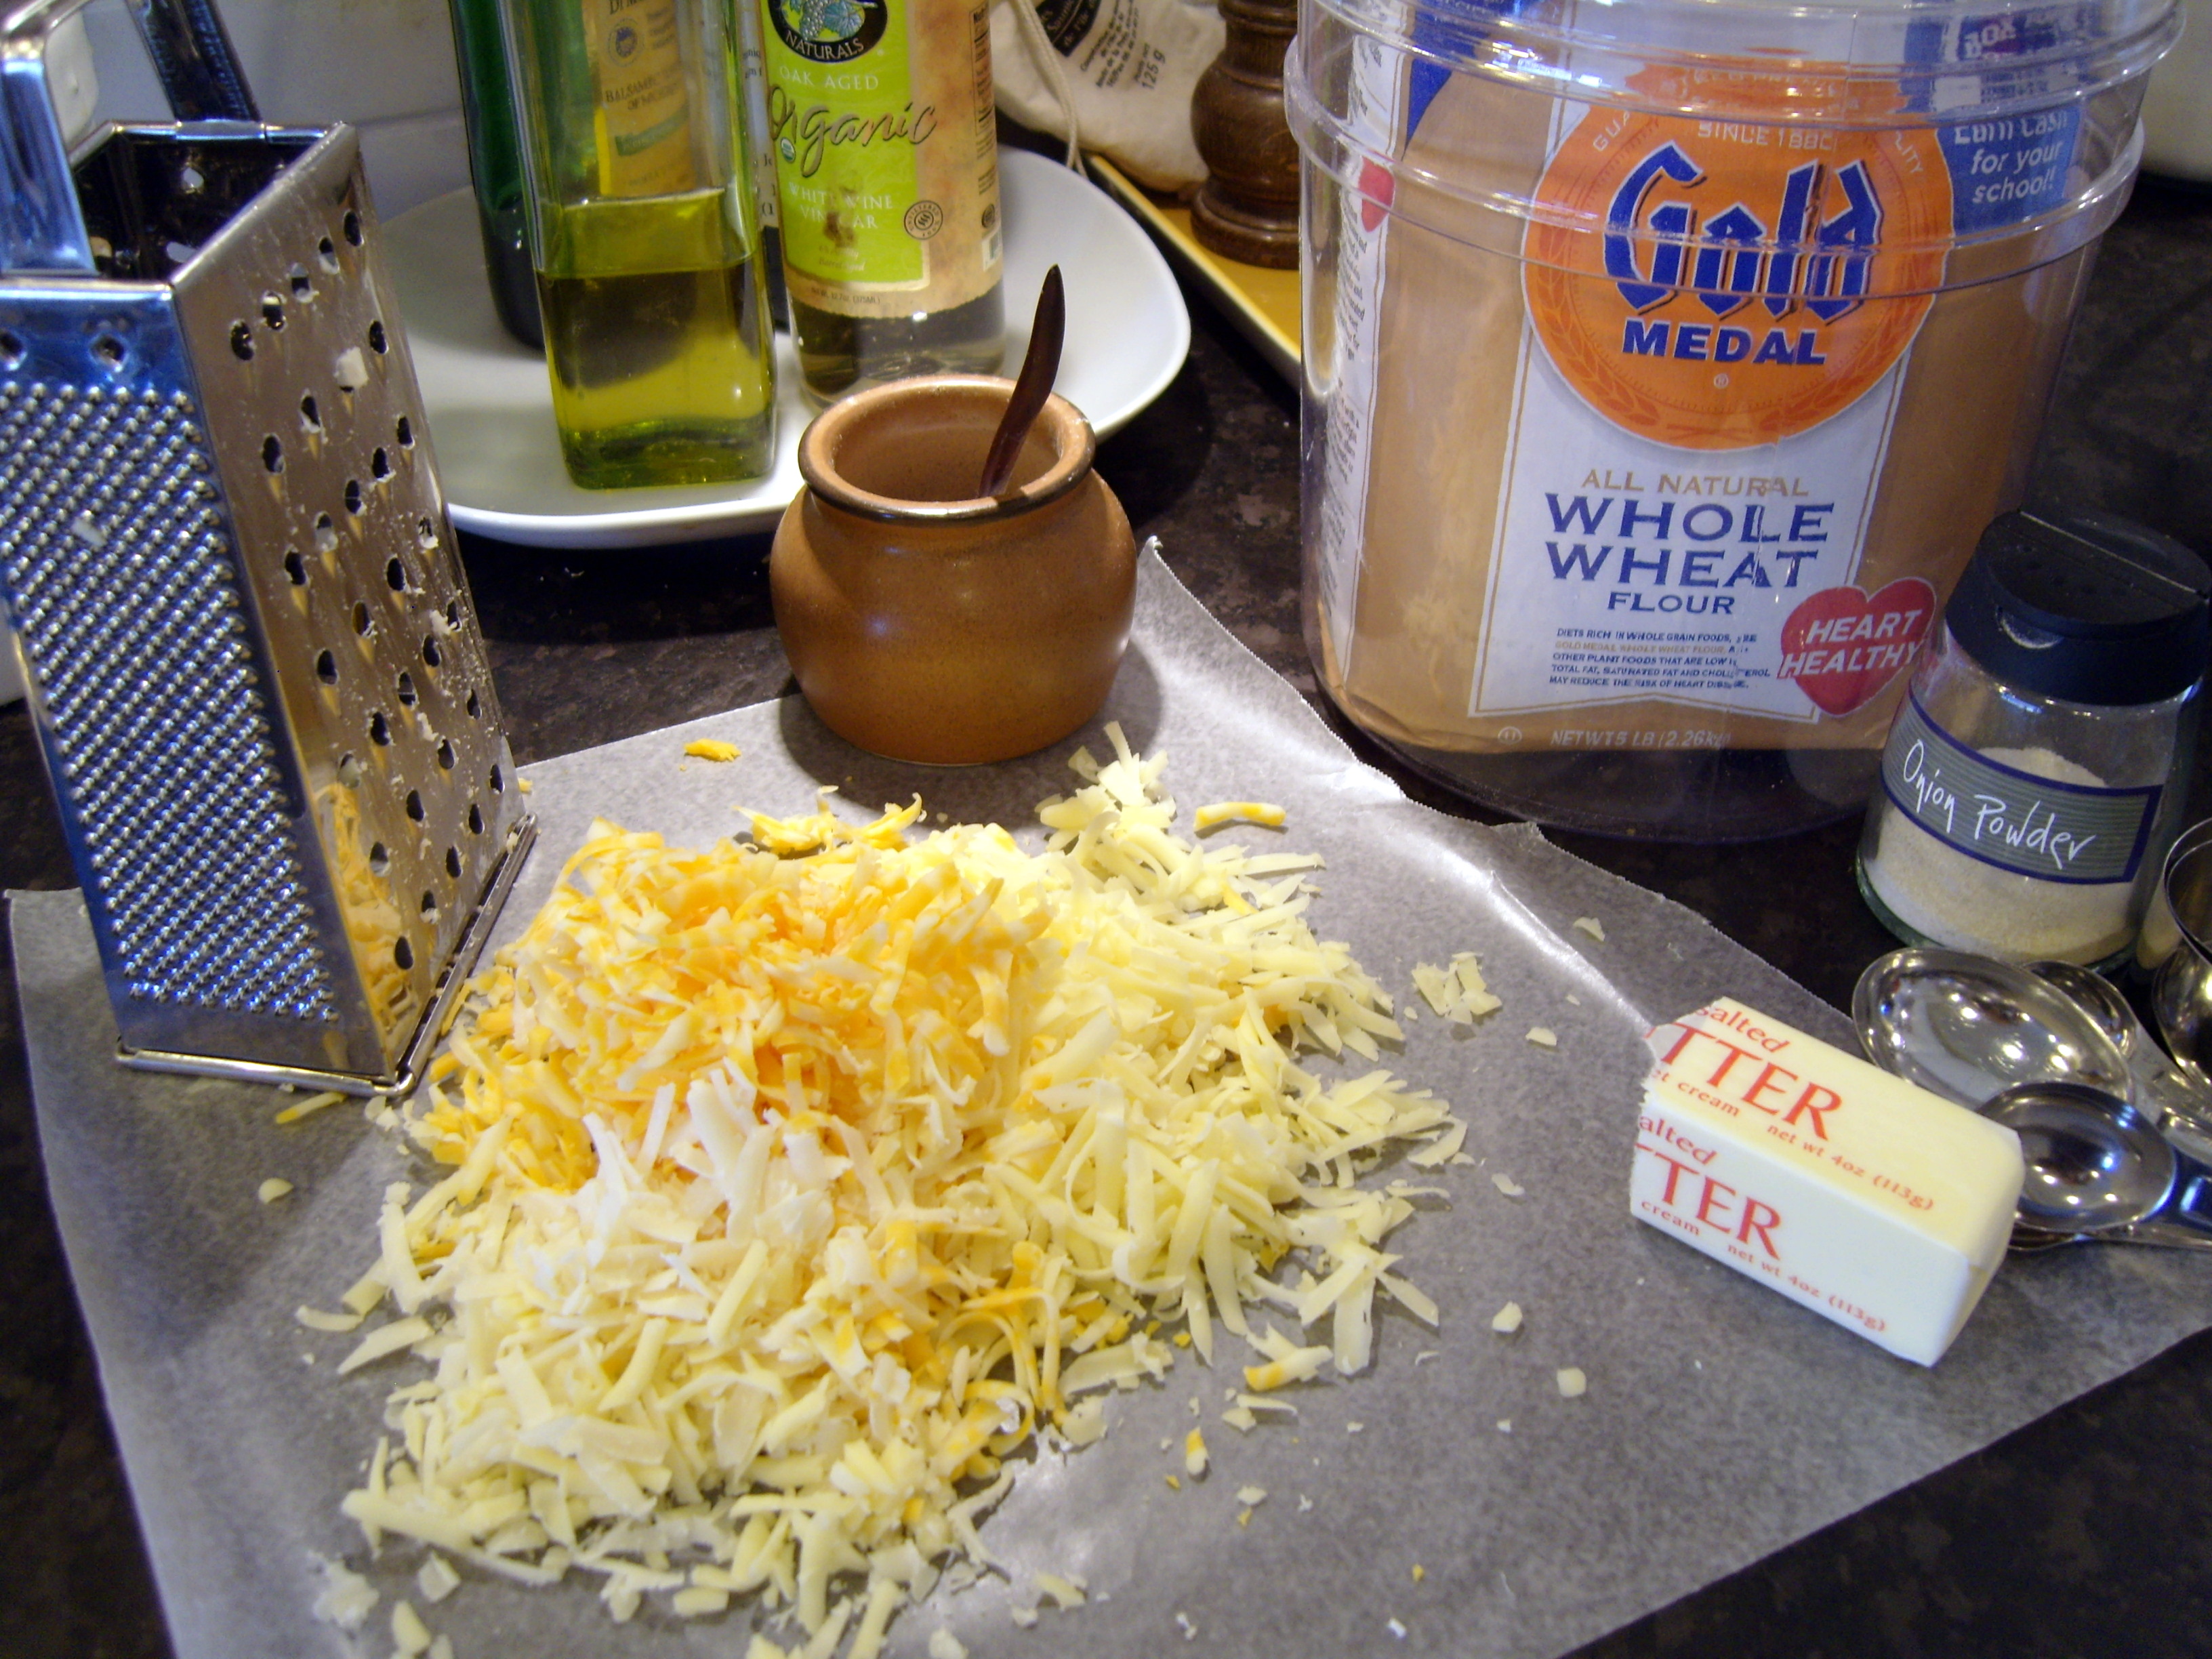
In the kitchen, I’ve been keeping things simple. Sunday night we were so wiped out, we ate popcorn for dinner. I jazzed up the popped kernels with a generous handful of grated cheese, leftover bacon, melted butter and salt. Mix it up and bake on a rimmed cookie sheet at 250 degrees for 5-10 minutes, until the cheese melts. Serve with Chocolate Banana Milk Shakes (from Mollie Katzen’s kid’s cookbook Pretend Soup).

Cheddar Bacon Popcorn

I also tried one new recipe from Kim Boyce’s Good to the Grain. With the illicit stash of cheap quinoa flour that I brought from Ecuador in my suitcase, I made the Banana-Walnut cake. My kids often say they don’t like nuts, but they sure liked the cake. It was lovely with a tall glass of iced coffee while catching up with a good friend. (It’s a super moist cake and keeps really well for a few days–two, at least!) I’ve got some amaranth flour to try next. Next week I’ll share a recipe for a cool Avocado Shrimp Roll–wonderful for a summer lunch or light supper. I need to make it one more time to get it just right…

Cleaning:

HAHAHA!!! By that I mean that things are getting pretty dusty–possibly even sticky–around here. The daily laundry routine has helped me keep on top of the dirty clothes, and I’ve managed to make the bed and do the dishes every day. I even broke out the vacuum and attacked the family room rug (and then issued one of my frequent bans of food in the family room–frequently broken by everyone, including me). But any serious cleaning is going to wait until next week. We’re expecting houseguests again next weekend, so I’ve divvied up my cleaning tasks throughout the week on my list at TeuxDeux.com. I love TeuxDeux because I can’t misplace my list! It automatically moves any items you haven’t crossed off onto the next day’s list–so easy.

How do you prepare for houseguests? Mints on the pillow?

Stenciled Star Wars Cake

You guys know I don’t have any actual training in cake decorating, right? Whatever I do is self-taught, and I’m always looking for ways to simplify. So when my best friend asked me to make a small cake for her Star Wars loving son because she couldn’t find one at the grocery store bakery, I gave it a shot. I scrolled through pages and pages of Star Wars cakes on Google Images, many of them elaborate sculpted R2-D2s or giant Millennium Falcon models. I knew I wasn’t going to drape anything in fondant or pipe complicated patterns. (Have I said this before? I don’t like how fondant tastes, so I don’t use it.) Then I saw this cake and this cake. I decided the cake needed to be blue and say “Star Wars.” Anything else would be the proverbial icing.

Luckily, I had some of this food color spray left from another cake, and I decided to experiment with a stencil. I printed out the Star Wars logo and cut it out with a craft knife. I laid it gently on the frosted cake, sprayed a couple light coats of blue, and very gently lifted off the stencil. We found a Darth Vader candle at the party store and called it good. (Oh yeah, there’s some sparkling sugar scattered there as “stars.”)


If you can find a graphic that you can cut into a stencil, you can put anything on a cake to fit the birthday boy or girl’s interests. Don’t trust your piping skills (or lack thereof)? Stencil it!

Applesauce Bran Muffins

I love getting out of bed before the kids. It doesn’t happen very often. In fact, if I plan to get up before they do, someone inevitably hears and pops out of bed ready to start the day. So much for a quiet half hour with my coffee.

But yesterday morning I hauled myself out of bed in a desperate attempt to silence the cat, who was going door to door, loudly trying to rouse someone to fill his empty dish.

So. I was up, and my husband had already filled my coffee cup. A good time for some muffins, before the children started caterwauling, too. They came out of the oven just as the first riser stumbled down the stairs for her dose of morning television.

Applesauce Bran Muffins

2 cups all-purpose flour

1/2 tsp. salt

1 Tbsp. baking powder

1/2 cup wheat bran

1/4 tsp. cinnamon

1/4 cup olive oil (or any vegetable oil or melted butter)

1 cup applesauce (I used unsweetened)

1/2 cup maple syrup

2 eggs

Heat the oven to 500 degrees F. Grease 12 large muffin cups and set aside.

Whisk the dry ingredients together in a large bowl. Whisk the liquid ingredients together well (I add them to a 2-cup glass measuring cup and whisk them right in the cup). Add the liquids to the dry ingredients and stir together no more than 20 seconds. I like to use a large spatula to make sure I scrape everything off the bottom of the bowl.

Scoop the batter into the prepared muffin tin. Put the tin in the oven and immediately reset the temperature to 400 degrees F. Bake 15-20 minutes, or until the muffins are golden brown and a skewer or toothpick inserted in the middle comes out clean. Serve warm.

Stone fruit pie, chocolate cream pie and a crust discovery

My husband is on a pie baking kick. He’s decided he needs to develop his pastry skills (everybody needs a goal), and who am I to discourage him? For Memorial Day he made this beauty:

Mmmmm…Stone Fruit Pie with Almond Streusel from Food & Wine. This one has peaches, apricots, plums and cherries. While he was at it, I asked him to double the crust recipe so I could make a Chocolate Cream Pie. Why have one pie when you can have two? WELL. The crust was a revelation! A REVELATION, I tell you! Flaky, tender, but also crisp and not a bit soggy under all that fruit and pudding. What was different?

Baking powder.

I did a little research. Rose Levy Berenbaum, trusted author of The Cake Bible and The Pie and Pastry Biblewrites in her own Basic Flaky Pie Crust Recipe that “baking powder lifts and aerates the dough slightly without weakening it, but it makes it seem more tender.” Whatever–it worked. That, and baking the pie in the lower third of the oven.

The crust I blind-baked for the chocolate pie turned out well, too. I’ve had problems with the last couple crusts I’ve blind-baked–all sorts of shrinking and tough pastry horror stories. This time we remembered to refrigerate the dough overnight before rolling it out, and then froze the unbaked crust in the pan for 30 minutes before baking (with foil and pie weights). Cue the singing angels!

Party cakes: best yellow layer cake with pastry cream and fresh fruit

A couple of months ago, I donated a custom party cake to a silent auction benefiting the Downers Grove Choral Society. Our director won the auction and asked me to make the cake for our chorus social.

This is one of my very favorite cakes, and I’ll share the method so you can make it, too! It’s colorful and showy, but doesn’t require complicated cake decorating skills. I was inspired by the signature cake from the Swedish Bakery in the Chicago neighborhood of Andersonville, and pictures of Fourth of July flag cakes topped with fresh fruit.

For the cake layers, I used Smitten Kitchen’s Best Yellow Layer Cake recipe. This was a 12-inch cake (40-50 servings), however, so I made two batches of cake batter–one for each 12-inch cake pan. I baked the layers, one at a time, in a 325 degree oven (a lower temperature allows larger cakes to bake more evenly) for about 50 minutes. I baked them the night before, let the layers cool completely, and wrapped them tightly in plastic wrap until the next afternoon.

The cake is filled with vanilla pastry cream. This recipe from King Arthur Flour is so easy (as directed, omit the whipped cream, because you want a sturdy, sliceable filling), and you can–and should!–make it ahead of time and chill it well. I used about two-thirds of the pastry cream to fill this large cake. The kids ate the rest for dessert last night, topped with extra fresh fruit and whipped cream.

I frosted the cake with a triple recipe of stabilized whipped cream. You can certainly just use regular, sweetened whipped cream, but if you need to make the cake several hours ahead, or you anticipate leftovers, stabilized whipped cream will ensure that the cream holds its shape under the fruit and doesn’t melt. I try to avoid specialty ingredients, but you should be able to find clear piping gel in the cake decorating aisle of your local craft store, or you can order it online from Wilton. King Arthur Flour also makes a whipped cream stabilizer.

To assemble the cake, first trim any domed top off the cake layers with a long, serrated bread knife so that they are fairly level. Place one cake layer on a cardboard cake board or serving platter. Spread chilled pastry cream about 1/2-inch thick over the layer, stopping about 1/2-inch from the edge all around (this allows a little space for the cream to spread when you place the top layer of cake over it). Place the second cake layer on top of the pastry cream.

(If you’re making a large cake, as I did, push a couple plastic drinking straws through the cake to anchor the layers together, and snip them off level with the top of the cake. I like this bit of insurance if I’m transporting the cake to another site.)


Spread about 1/3 of the stabilized whipped cream in a very thin layer over the entire cake. This is called the crumb coat, and it doesn’t have to look perfect. Refrigerate the cake for at least 30 minutes. While you’re waiting, wash and slice whatever fresh (the mandarin oranges are canned) fruit you choose and lay them out on paper towels, patting them dry if necessary.

Set aside about 1 cup of whipped cream if you’d like to pipe a decorative border  (you could skip this step completely). Use the remainder to frost the cake. You can go for a smooth look, or make it intentionally swirly. Then arrange the fruit in whatever pattern you like. I like to make monograms or numbers (for birthdays or anniversaries), but you can do whatever looks prettiest to you. You can use a single kind of fruit, or several.

Finally, heat a couple tablespoons of apple jelly (or any kind of light colored jelly) for 20 seconds in the microwave. Glaze the fruit very lightly with a pastry brush.

This cake is best served at room temperature, but store it for longer periods of time in the refrigerator.

Microwaving from scratch

I love my microwave. I know, it’s not a necessity in the kitchen–most everything you can make in the microwave can also be made on the stove or in the oven, often with better results. And I promise, I’m not living on Lean Cuisine and microwave popcorn. But the microwave can be a great tool when you’re cooking from scratch. You don’t need those packets of instant oatmeal–you can cook a bowl of old fashioned oats in under two minutes in the microwave. Steamed veggies? Add couple tablespoons of water to the vegetables in a covered microwave- safe dish (your mom’s old Corningware is perfect!), cook, drain and serve with a drizzle of something (vinaigrette, soy sauce, a pat of butter) and a dash of salt and pepper. Our microwave even has settings for “fresh vegetables” and “frozen vegetables,” and they work perfectly 90% of the time. (The other 10% usually just need a couple more minutes of cooking.)

And have you seen those microwave cakes in a cup making the rounds on Pinterest? We tried the microwave brownies (after the kids were tucked in, naturally, or I would have baked an entire pan of brownies), and I keep eyeing this little microwave coffee cake. I’m curious about microwave potato chips, but I don’t crave potato chips often enough to justify the effort.

My favorite microwave tip? Use it to dry fresh herbs! I have not tried it myself, not having grown many fresh herbs lately, but when I saw these instructions, I passed them on to my best gardening friend. She tested it and shared the results with me in the form of a beautiful jar of bright green dried parsley. So if I successfully grow any herbs from all the starts she has given me this year, I’ll be preserving my harvest in the microwave!

Here are my top five reasons to love the microwave:

  1. Reheating leftovers (quickly and right on the plate–saves time and dishes!).
  2. Softening butter.
  3. Melting chocolate or butter (the secret to one-bowl brownies).
  4. Cooking fresh or frozen vegetables (right in the serving bowl).
  5. Defrosting.


How do you use your microwave?

No-knead overnight orange rolls

I probably read too many food blogs, magazines and cookbooks, because every day I see delicious recipes that I have no time to make. Just last week I bookmarked these decadent orange rolls and I wanted to make them right away. But once I sat down and really read the recipe, the three cups of confectioner’s sugar and over two sticks of butter scared me off a little. It’s not that I didn’t think they would be delicious, it’s just that I went to the freezer and realized that we were on the last pound of the four-pound pack of butter from Costco that we bought at Easter. Wasn’t Easter just a little more than a week ago? Just where did all that butter go?

But I couldn’t get those orange rolls off my mind. After a little browsing through the archives of Artisan Bread in Five, I decided to make a batch of no-knead challah dough, and then turn that into orange rolls. Granted, I still used two sticks of butter, but since I only used half of the dough…well, you do the math. There wasn’t too much effort involved (five minutes here, ten minutes there–maybe 30 minutes total), and the results were spectacular. SPECTACULAR, I tell you. Tender, fluffy and gooey, with a distinct orange perfume. I still have the other half of the challah dough, and I’m sorely tempted to make another pan of orange rolls. Instead I’ll try to be practical and make little ham and cheese buns–something to pop into lunch boxes.

You, however, should go make orange rolls immediately. You can either make a whole batch of challah dough (four pounds) and use half for the orange rolls, or cut the dough recipe in half and use all of it. If you don’t have enough people around to eat a whole pan of orange rolls, freeze the extra baked rolls individually (well-wrapped) and enjoy them whenever. They reheat very nicely.

No-Knead Overnight Orange Rolls

1/2 batch of no-knead challah dough (about 2 lbs. of dough–ignore the topping)

zest of 2 large oranges

8 ounces unsalted butter, melted

3/4 cup brown sugar

1 tsp. vanilla

Glaze:

juice of 1/2 orange (about 1/3 cup)

1 1/2 cups confectioner’s sugar

1/2 tsp. vanilla

The day before you want to serve the orange rolls, mix up the challah dough and let it rise for 2 hours at room temperature. Refrigerate the dough. Before you go to bed, sprinkle plenty of flour on the top of the cold dough and scoop out half–or all of it if you only made half a batch–onto a well-floured silicone mat. Roll the dough out into a 10″x18″ rectangle, or about the size of the silicone mat. Let it rest while you mix the orange zest, butter, brown sugar and vanilla together in a small bowl. Spread the mixture onto the dough all the way to the edges. Roll the dough into a log from the longer side, lifting the silicone mat to help push it along (like rolling sushi). Cut the log into 12 equal slices with a piece of dental floss, and place each roll into a well-greased 9″x13″ baking pan. Cover tightly with plastic wrap and refrigerate overnight.

In the morning, heat the oven to 350 degrees. Remove the pan from the refrigerator and let rest for at least 20 minutes on top of the warming oven. Bake the rolls, uncovered, for 30-40 minutes, or until a deep golden brown.

While the rolls bake, mix up the glaze. Whisk the orange juice, confectioner’s sugar and vanilla together in a small bowl. Let the rolls cool slightly (5-10 minutes), and then spoon the glaze over the top. Serve warm.

Baking with whole grains

I’ve baked with whole wheat flour for several years now. I certainly haven’t given up white flour, but I often replace up to half of the white flour with whole wheat in a recipe that I’m comfortable with. In some recipes you can get away with using all whole wheat flour (brownies!), and some recipes are designed to showcase the nutty flavor of whole wheat (remember these chocolate chip cookies?). I’ve been meaning to try baking with some other whole grain flours, but that meant planning ahead and making a special trip to Whole Foods or Bulkfresh Pantry.

After months of flipping longingly through the pages of Good to the Grain and La Tartine Gourmandeboth of which are full of recipes with unusual flours, I finally spent a couple of hours stocking up on a variety of whole grain flours. I bought about two pounds each of barley, rye, spelt, millet and buckwheat flours. While I was at it, I bought oatmeal, and raw sunflower and pumpkin seeds, too. I also contemplated quinoa and amaranth flours, but balked at the price. I had plenty to experiment with, so I stopped there.

At home, I labeled each bag of flour and dropped it into a zippered freezer bag. They all pack nicely into the freezer where they’ll stay fresh until I’ve worked my way through some more recipes. I can’t wait to try these Rye Crumble Bars, and Sunday morning might be the perfect time for some Five-Grain Cream Waffles.

But my first attempt was the currant scone recipe with spelt flour from Good to the Grain. It was already late in the evening and I wanted something for an easy breakfast the next morning. I made two small changes: using raisins instead of currants, and making 14 smaller scones instead of 9 large ones. And if I haven’t confessed this before, I’ll tell you now: I almost never sift. Unless it’s a wedding cake or there’s cocoa powder (that stuff really clumps) in the recipe, I just dump the dry ingredients in the bowl and whisk them together well.

The scones were lovely, and we each had two for breakfast and finished them off the next morning. They were incredibly tender, but with a slightly crunchy golden crust. The spelt flour has its own subtle sweetness, so there’s only a little bit of sugar in the mix, just waiting for a bit of butter and your favorite jam.

Spelt and Raisin Scones

adapted from Good to the Grain 

1 1/4 cups spelt flour

1 cup all-purpose flour

2 T. sugar

1 T. baking powder

1/2 tsp. kosher salt

2 ounces cold unsalted butter, cut into small chunks

1/2 cup raisins

1 1/2 cups heavy cream

Heat oven to 400 degrees. Grease a large baking sheet. Whisk the dry ingredients together in a large bowl. Add the butter chunks and rub the butter into the flour with your fingers until the mixture resembles cornmeal. Stir in the raisins. Pour in the cream and stir just until the dough sticks together and all the flour is incorporated.

Using an ice-cream scoop or two spoons, scoop out 12-15 mounds of dough onto the baking sheet, leaving a couple inches between the scones. Bake for 12-15 minutes, or until the scones are golden brown. If you bake them the night before, just pop them back into a 300 degree oven until they are warm.

Whole wheat cheese crackers

I think my children could eat their weight in Cheez-Its or goldfish crackers if given the opportunity. I don’t buy either one regularly (unless there’s a good sale and I have a coupon!), but that means I’m often scrambling to find something to pack in their lunches or dole out as an afternoon snack. I’ve been meaning to try this recipe for a long time, but I knew anything involving a cookie cutter–especially a teeny tiny fish-shaped one–was going to be filed under Too Fussy in my book. Finally it occurred to me that I could just cut the crackers into squares. I know! What a revelation! I happen to have a fluted pastry wheel, so that made the edges decorative, but a pizza cutter or a knife would work just as well. These took about 15 minutes of prep, with another 15 minutes for chilling and 15 minutes for baking. Not bad at all.

The trouble with these little crackers is simply that one batch is not enough. I am going to have to hide them from myself. The cheese flavor sings out and they are satisfyingly crispy. It makes me wonder what other flavor combinations might work…add some herbs? A little garlic? I do know that next time, I’m going to double the recipe.

      Whole wheat cheese crackers

adapted from Smitten Kitchen

1 1/2 cups grated hard cheese (I used a combination of cheddar, colby jack, Jarlsberg and Pecorino Romano)

1/2 cup whole wheat flour

1/4 cup all-purpose flour

1/4 tsp. kosher salt

1/8 tsp. onion powder

4 Tbsp. cold unsalted butter, cut into chunks

Put all ingredients into the food processor. Pulse a couple of times, and then run the processor for about 2 minutes, or until the dough is well-mixed and easily pressed into a ball. Form the dough into a disk, wrap in plastic wrap, and refrigerate for 30 minutes (or freeze for 15 minutes). Heat oven to 350 degrees. Roll out the dough to 1/8 inch between two sheets of wax paper. Cut the dough into 1-inch squares with a pastry wheel, pizza cutter, or sharp knife. Transfer squares to an ungreased baking sheet and prick each one with a fork. Bake for 12 to 15 minutes. Place the baking sheet on a rack and cool completely.

Makes approximately 100 crackers.

Best of the bake sale

Is it just me, or has the demand for home baked goodies decreased? The bake sale used to be the classic fundraiser, but now most groups sell candy bars, wrapping paper, popcorn or magazine subscriptions. In school settings, there’s always the issue of allergies. Or is it just that people don’t bake anymore?

Still, there are a few occasions that call for a home baked donation. I belong to a community chorus that holds a couple of bake sales a year (usually during intermission or after a concert), so I try to do my part. But baking time also comes at the same time as extra rehearsals, so I’ve got a new strategy. I want my goodies to be as fresh as possible, but I don’t want to be piping elaborate decorations at 4 a.m. the day of the concert.

Delicious, easy to transport, not too time or labor intensive. Really, aren’t those requirements for everything in life?

My favorite bake sale recipes are small loaves of banana bread (Coconut Banana Bread with Lime Glaze, or Chocolate Swirl Banana Bread), scones, and olive oil granola. I’ve baked cupcakes before, which were a big hit, but they are labor intensive, the ingredients can get pricey, and you really need to buy special boxes. If I had the time, I’d make them again (fancy cupcakes fetch a good price!)–but I usually don’t have the time.

In real estate they say, “Location, location, location!” In sales, it has to be, “Packaging, packaging, packaging!” Seriously, if you’re asking people to shell out $3 for six cookies, they’d better look pretty and not be sliding around on a paper plate under some wrinkled plastic wrap. I always buy these clear treat bags with silver twist ties at my local craft store (and always with a 40% off coupon!). I get a pack of 50 for under $3. They are the perfect size for a stack of half a dozen cookies or brownies, two cups of granola, or a little loaf of bread. Label your items in your nicest handwriting (I usually use white mailing labels and a colorful pen, or sometimes pretty labels that I bought with yet another coupon).

If I have to bake bread even a couple days ahead, I package everything up and then seal it again in a ziplock freezer bag. Store it in the freezer until the morning of the bake sale. Be sure it has sufficient time to thaw. Nobody wants to buy half-frozen baked goods.

I don’t like to freeze baked cookies (for home, sure–to sell, no), but I will often mix the dough up to a week ahead and flash freeze the scooped cookies. Then I only have to bake the cookies the night before the sale.

Now that I’ve gotten my bake sale baking routine down to a science, the hardest part is fending off the disappointed family members who want to eat my wares! (It’s always a good idea to bake a little extra to keep your family happy.)